1) To use Oliev HubSpot theme first you have to create an account on CMS HubSpot.
How to create account CMS HubSpot - A tutorial on how to create your account CMS HubSpot.
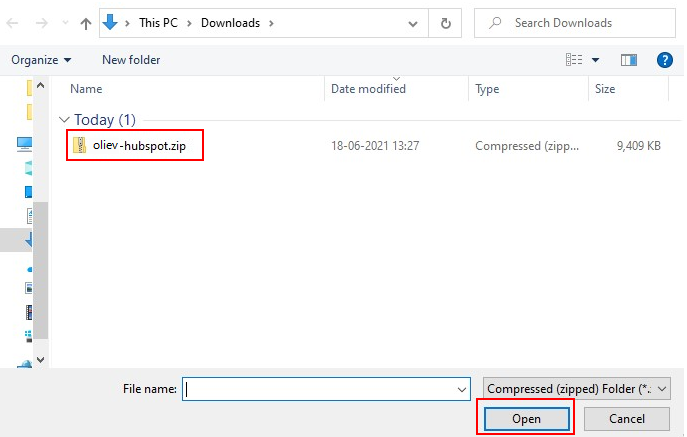
2) After purchasing the theme, download the zip file and then
- Access your HubSpot account.
- In your HubSpot account, click the settings icon in the main navigation bar

- In the left sidebar menu, navigate to Website > Themes.
- In right top click Upload Theme.
- Choose the downloaded theme and click Open.
Create and Publish a Page
Create New Page
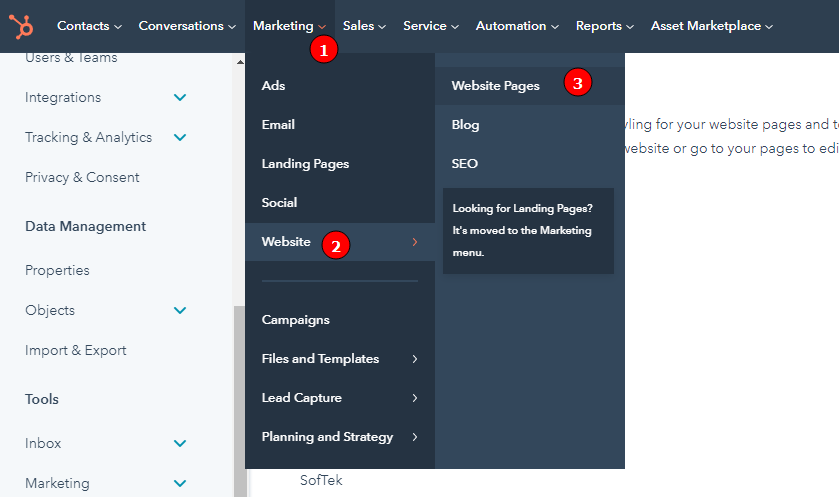
- In your HubSpot account, navigate to Marketing > Website > Website Pages.
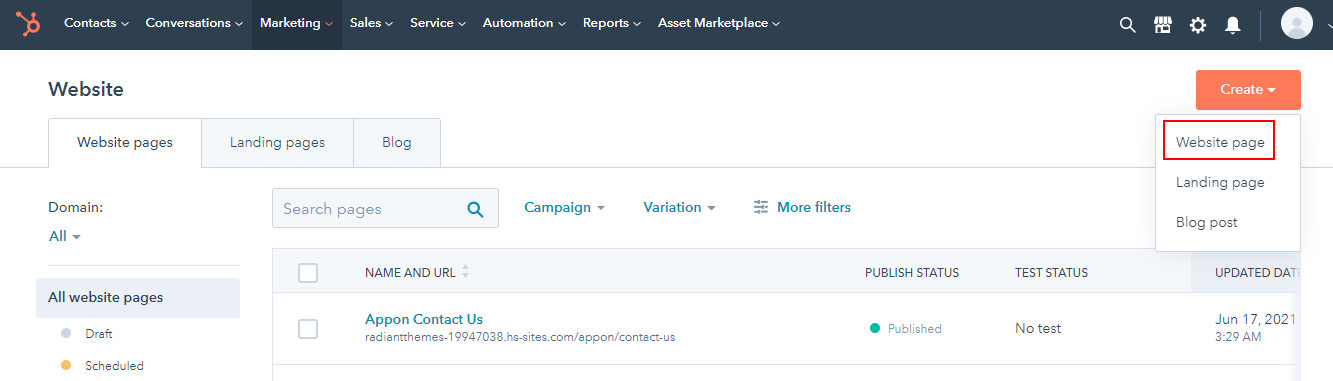
- In the upper right, click the Create dropdown menu and select Website page.
- Hover over a template and click Preview in the upper right to see how it will appear on desktop or mobile device. To create a new page with this template, click the template.

- After choosing template, choose Page.
- Give your page an internal page name and click Create page.
Please note: you'll be required to give your page a public title in your settings before publishing it.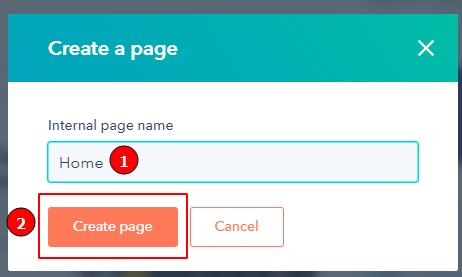
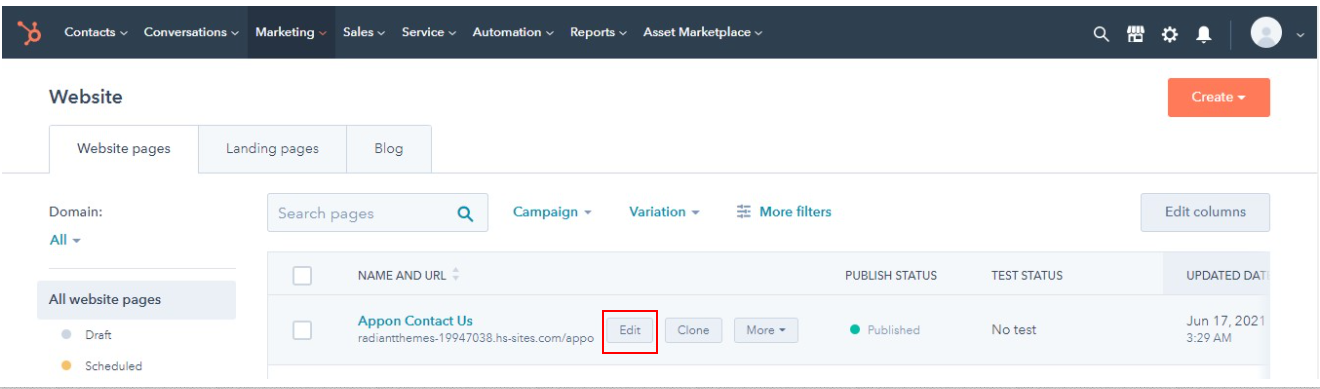
Edit an Existing Page
- In your HubSpot account, navigate to your landing pages or website pages.
- Hover over an existing page in your dashboard and click Edit.
Setup Blog Listing and Blog Details Template
- In you HubSpot account, click the Icon Settings in the main navigation bar.
- In the left sidebar menu, navigate to Website > Blog.
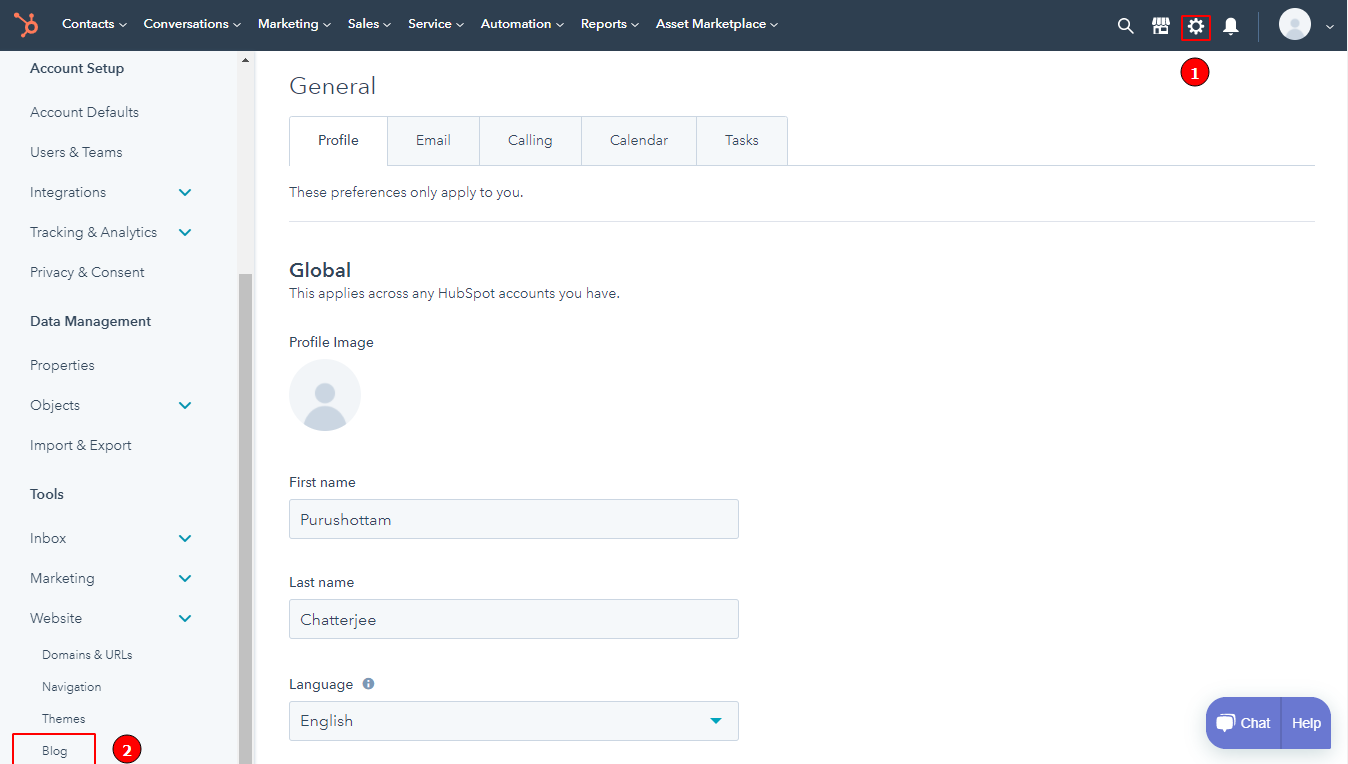
- In the top right, click Create new blog.

- Set up your blog's name, language, URL and Meta Description.
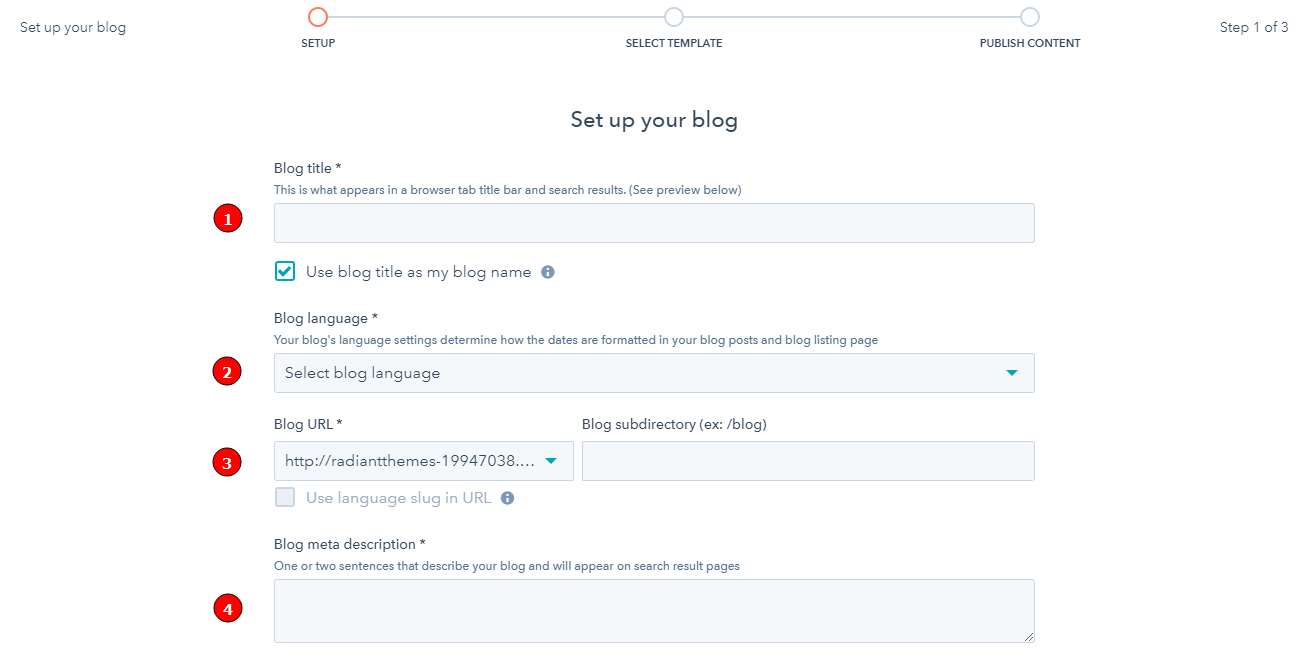
- Click Next.
- Select a template for your Blog Post, then select a template for your Blog Listing Page.

Theme Navigations
Setup A New Menu
- In your HubSpot account, click the Icon settings in the main navigation bar
- In the left sidebar menu, navigate to Website > Navigation.

- If there is no existing menu, click on the Create Menu button.

- If there are existing menus, use the dropdown menu to select an existing menu to update. To create a new menu, click + Add menu.
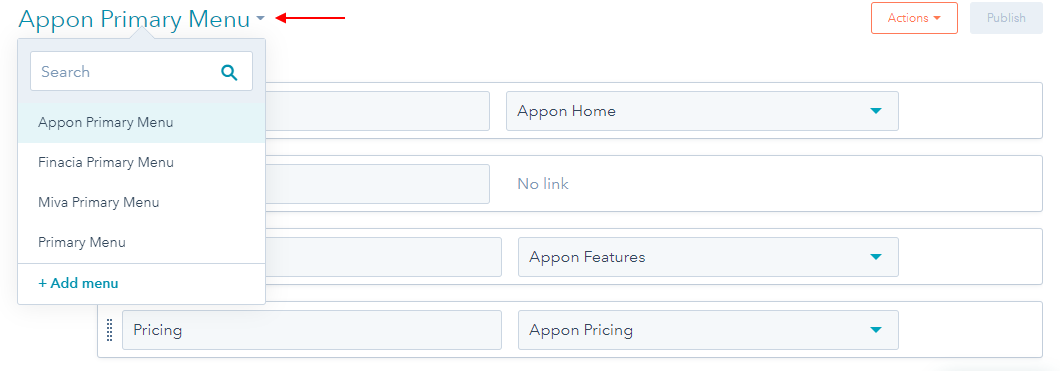
- Enter Menu name, after click Create Menu

- Click Add menu item

- Hover your mouse above or below an existing menu, then click the + icon and select an item to add to the navigation:

- Add item without link: adds another item to your menu that doesn't link to an existing page. This is often used as a placeholder for child menu items.
- Add page link: adds a menu item that links to a specific HubSpot page.
- Add URL link: adds a menu item that links to an external URL.
- Give your menu item a name in the Menu item label.
- Choose a HubSpot page or enter a URL for this menu item if you want it to be linked.
- Choose Action
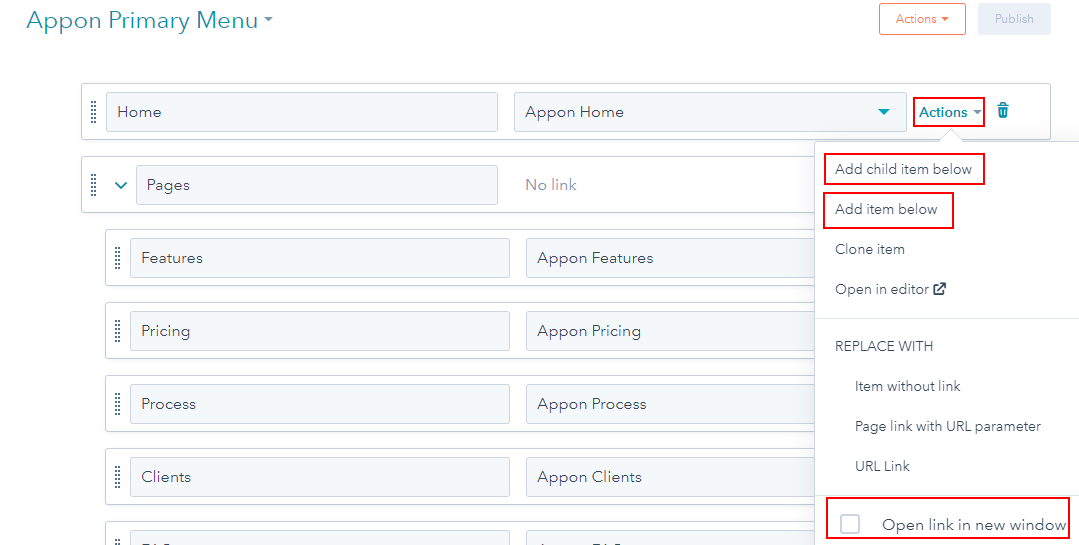
- You can also add a menu item by hovering over the right side of an existing item and clicking Actions > Add item below.
- Hover over the top-level menu item. Then click Actions and select Add child item below.
- If you want this menu item link to open in a new window, hover over the right side of the menu item. Click the Actions dropdown menu and select the Open link in new window checkbox.
- To finalize the changes you've made to your menu, click Publish.
Setup Default Logo
- In your HubSpot account, click the Icon settings in the main navigation bar.
- In the left sidebar menu, navigate to Website > Pages > Navigate to the Branding tab.

- Upload your logo
- Edit your logo's settings:
- In the Logo alt text field, add alt text that describes your logo's appearance and content
- To change your logo's dimensions, enter a width and height in the Logo width and Logo height fields.
- To direct visitors to a URL when they click on your logo, enter the URL in the Logo link field.

- In the bottom left, click Save.
Setup Header and Footer
- From editor home page move the mouse to the header and footer of the home page then left click mouse and choose Open in global content editor.

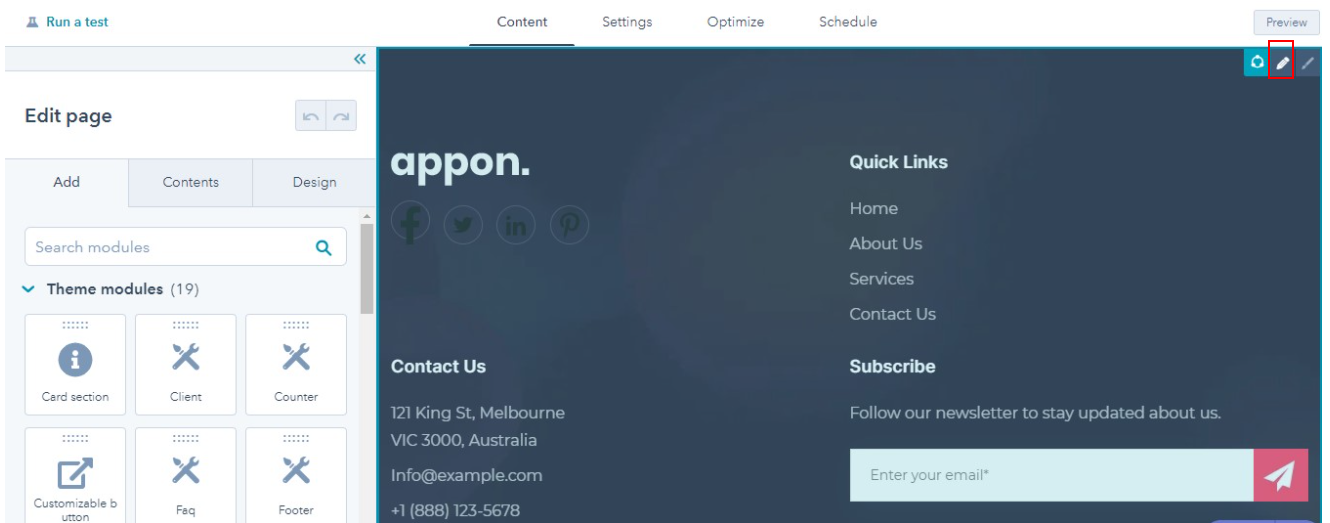

- Edit the available modules in the header and footer.
- After edit modules click Publish to return page editor.
Setup Events
(Point to Note:- You can only use this if you've the HubDB available on your subscription)
1) Go to 'Marketing > Files and Templates > HubDB'.

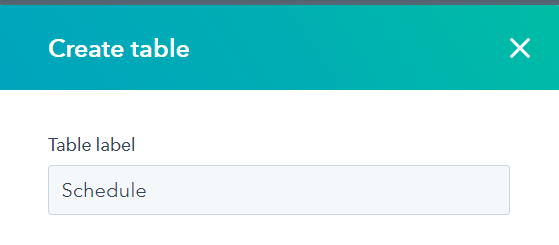
2) Create the table by clicking on 'Create Table'.

3) Create 3 tables by naming 'schedule_table_join', 'speakers_table_join' and 'sponsors_table_joins'.
4) Download those tables data from below links:-
https://oliev.radiantthemes.com/wp-content/uploads/2022/04/table-joins-schedule-2022-04-28.csv
https://oliev.radiantthemes.com/wp-content/uploads/2022/04/table-joins-speakers-2022-04-28.csv
https://oliev.radiantthemes.com/wp-content/uploads/2022/04/table-joins-sponsors-2022-04-28.csv
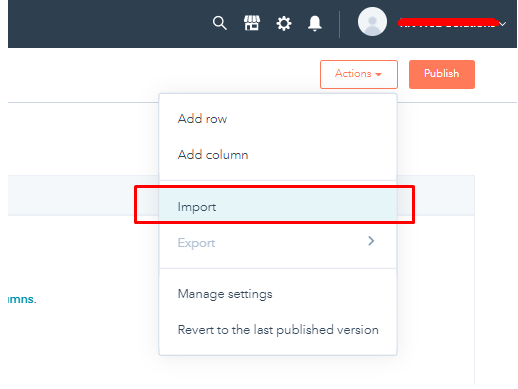
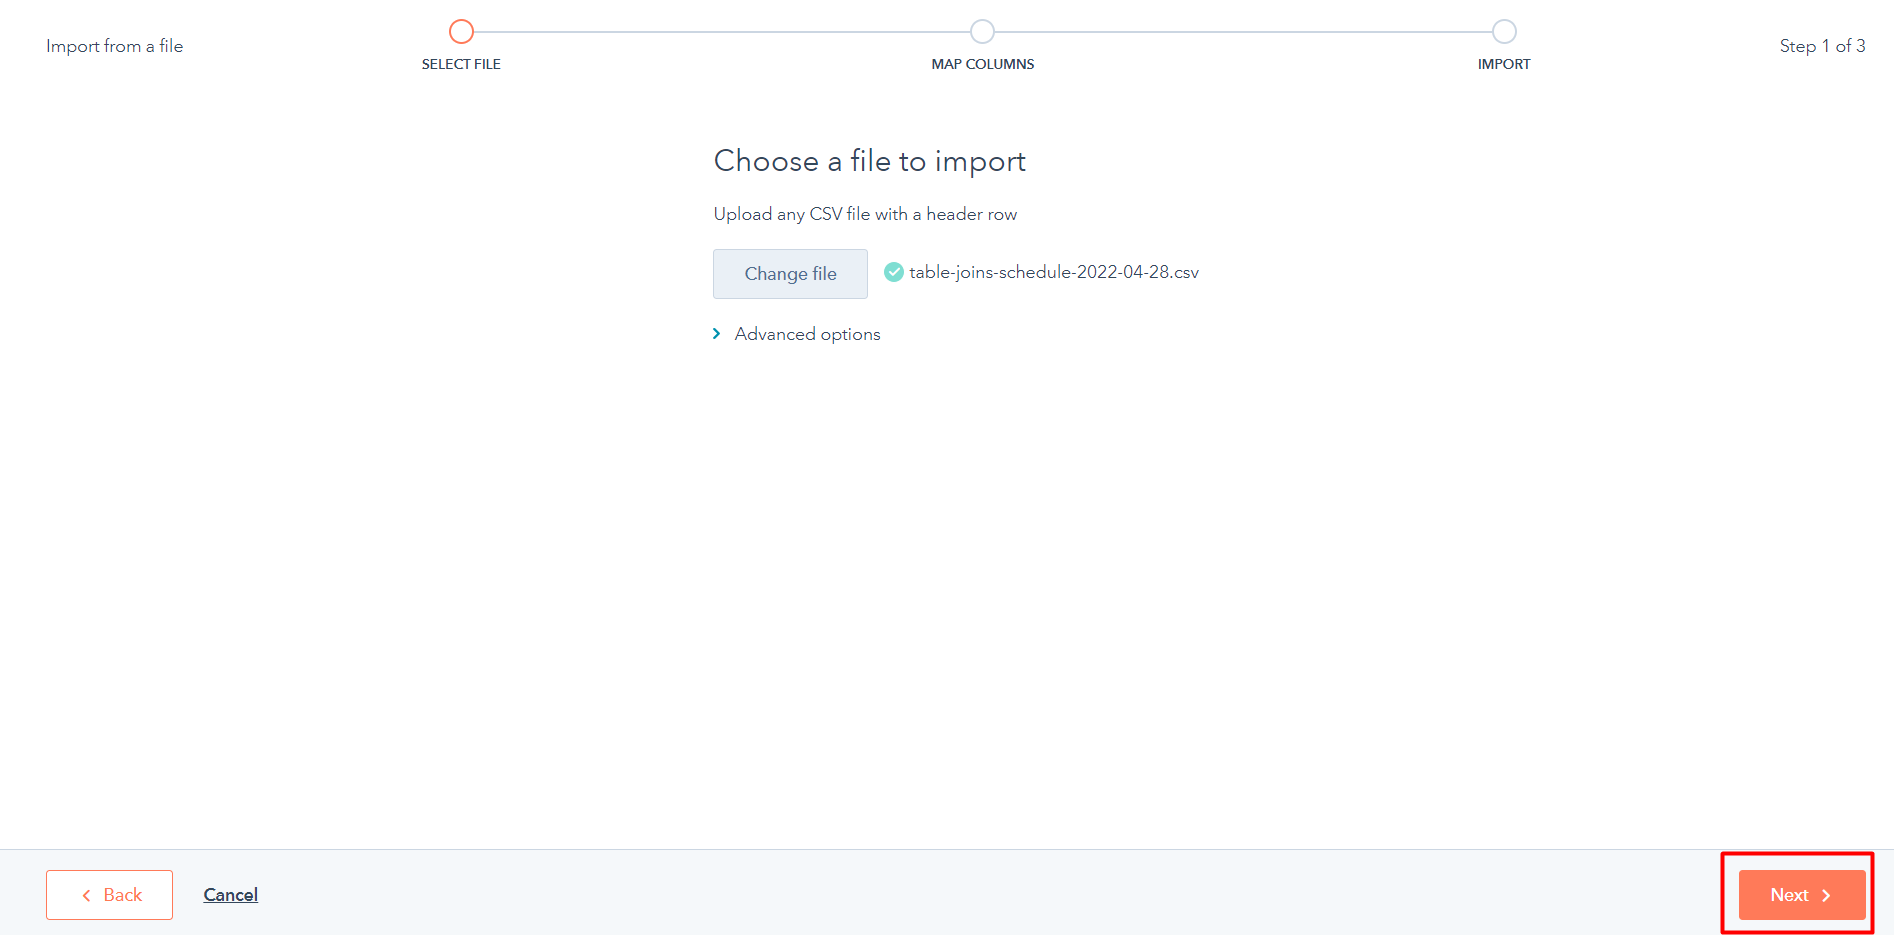
5) Now go to 'Marketing > Files and Templates > HubDB' again and edit any of those created table. Suppose you've opened 'schedule_table_join' table. Now import that downloaded CSV data (For 'schedule_table_join' table, CSV file is 'table-joins-schedule-2022-04-28.csv' an so on).
6) Upload the CSV file and click on next.
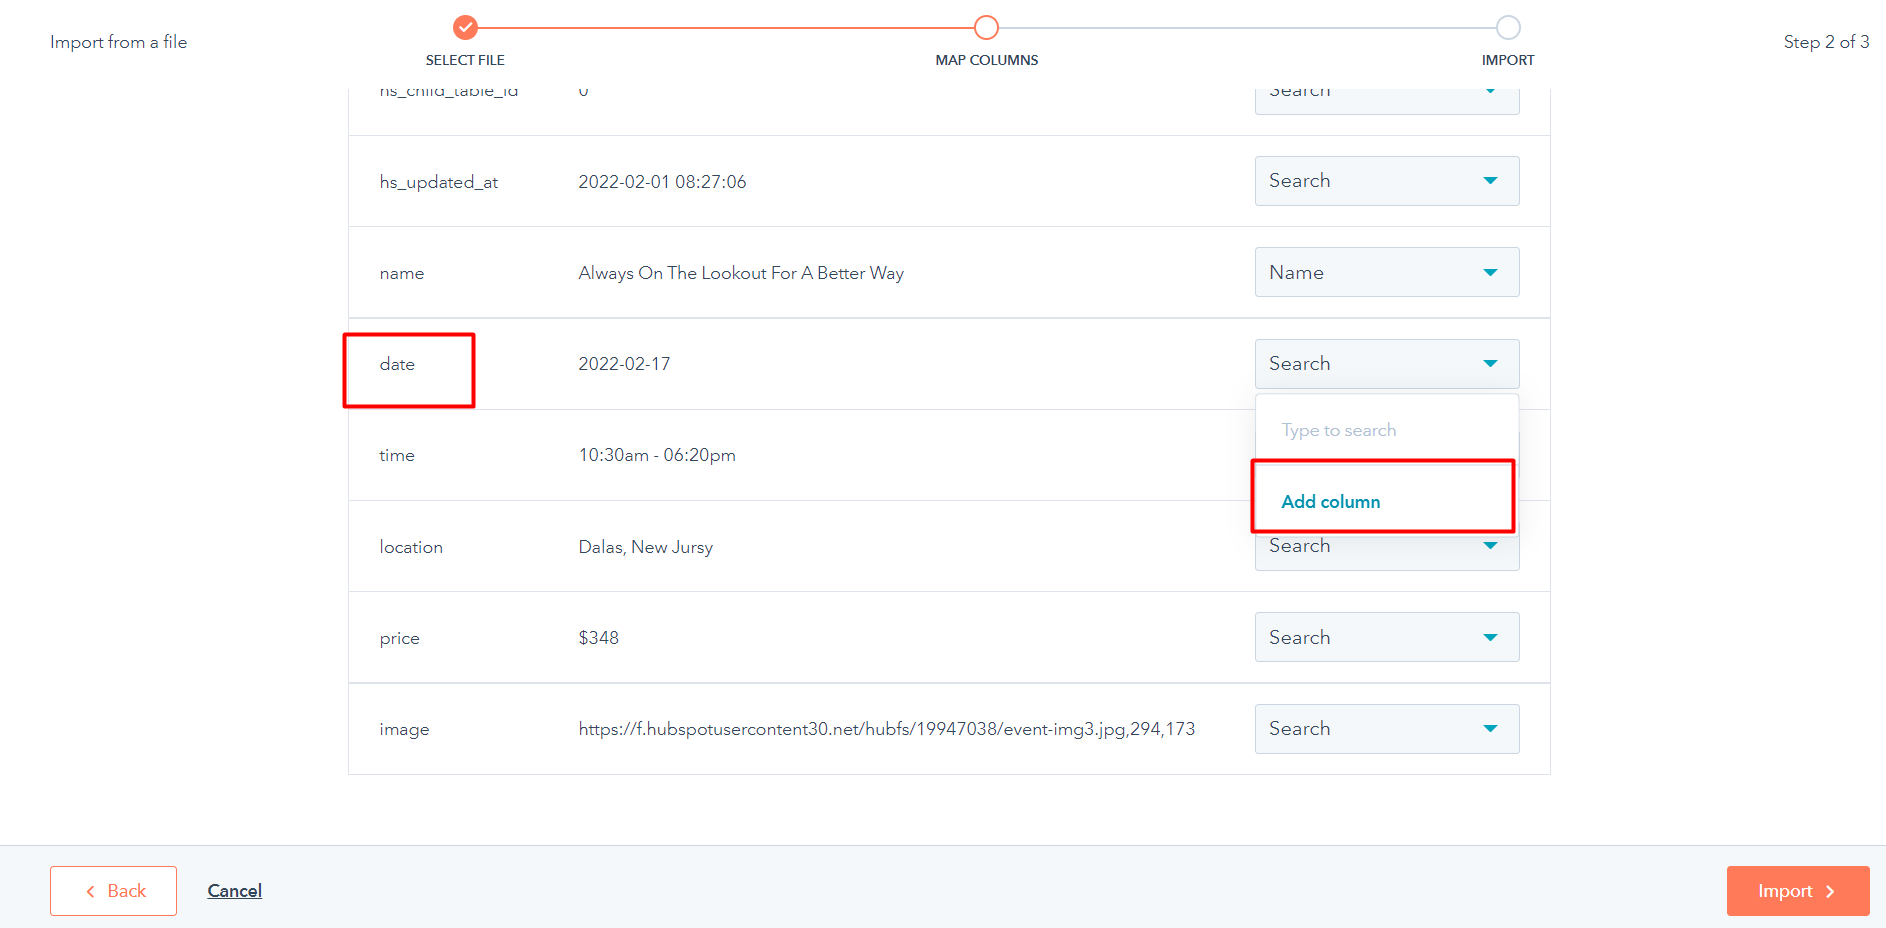
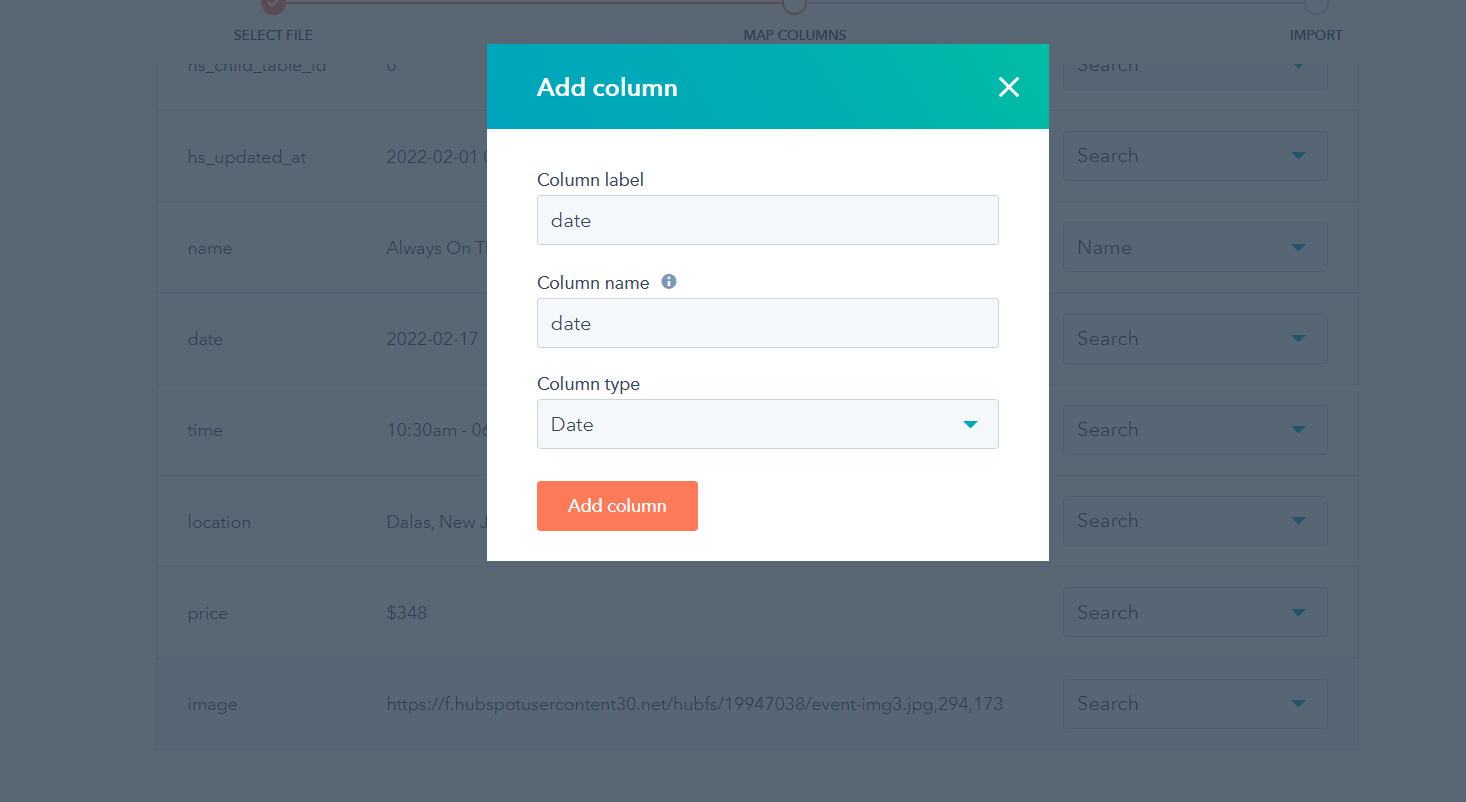
7) Go to the fields next to 'name' and click on 'Add column' and provide column name same as the first column. For example, for the 'date' fields, provide 'date' as column name.
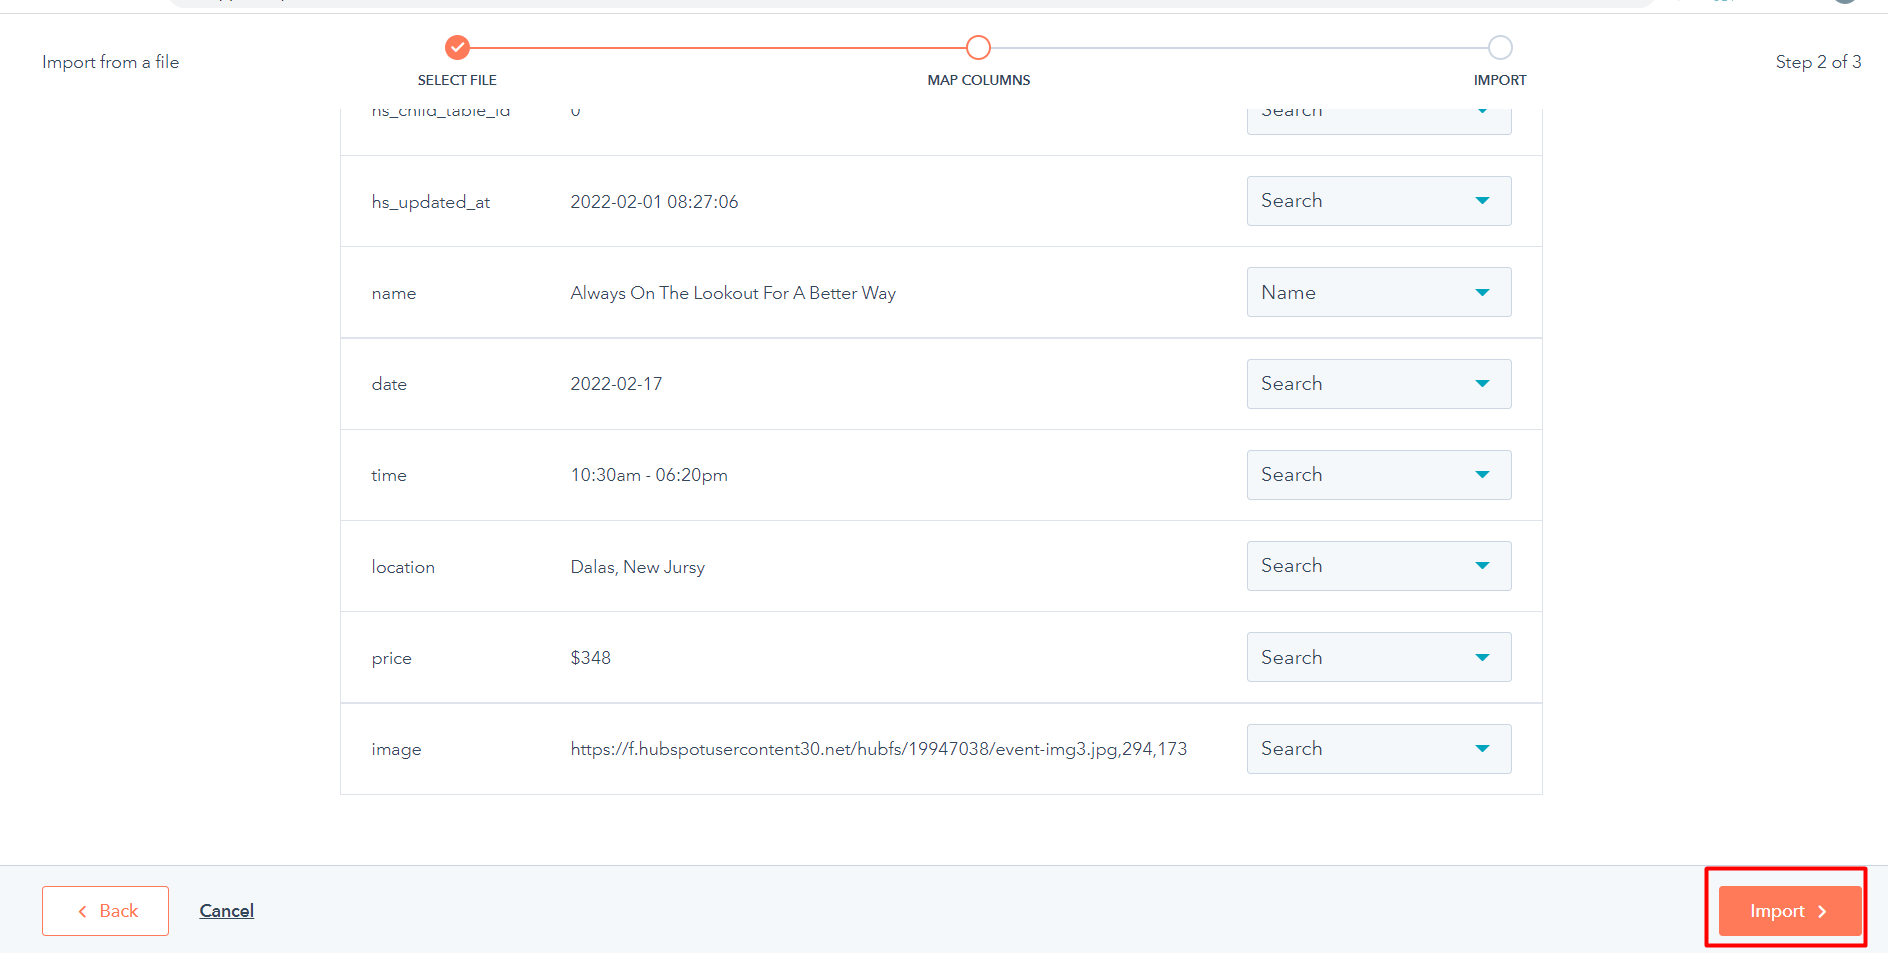
8) Choose 'Column Type' as respective. For example, choose 'Date' if there is any date, choose 'Date and time' if time is in there, choose 'Image' for image and choose 'Text' for others.
9) After selecting all columns name and type properly, click on 'Import' and table will be imported. Do same for all 3 tables.
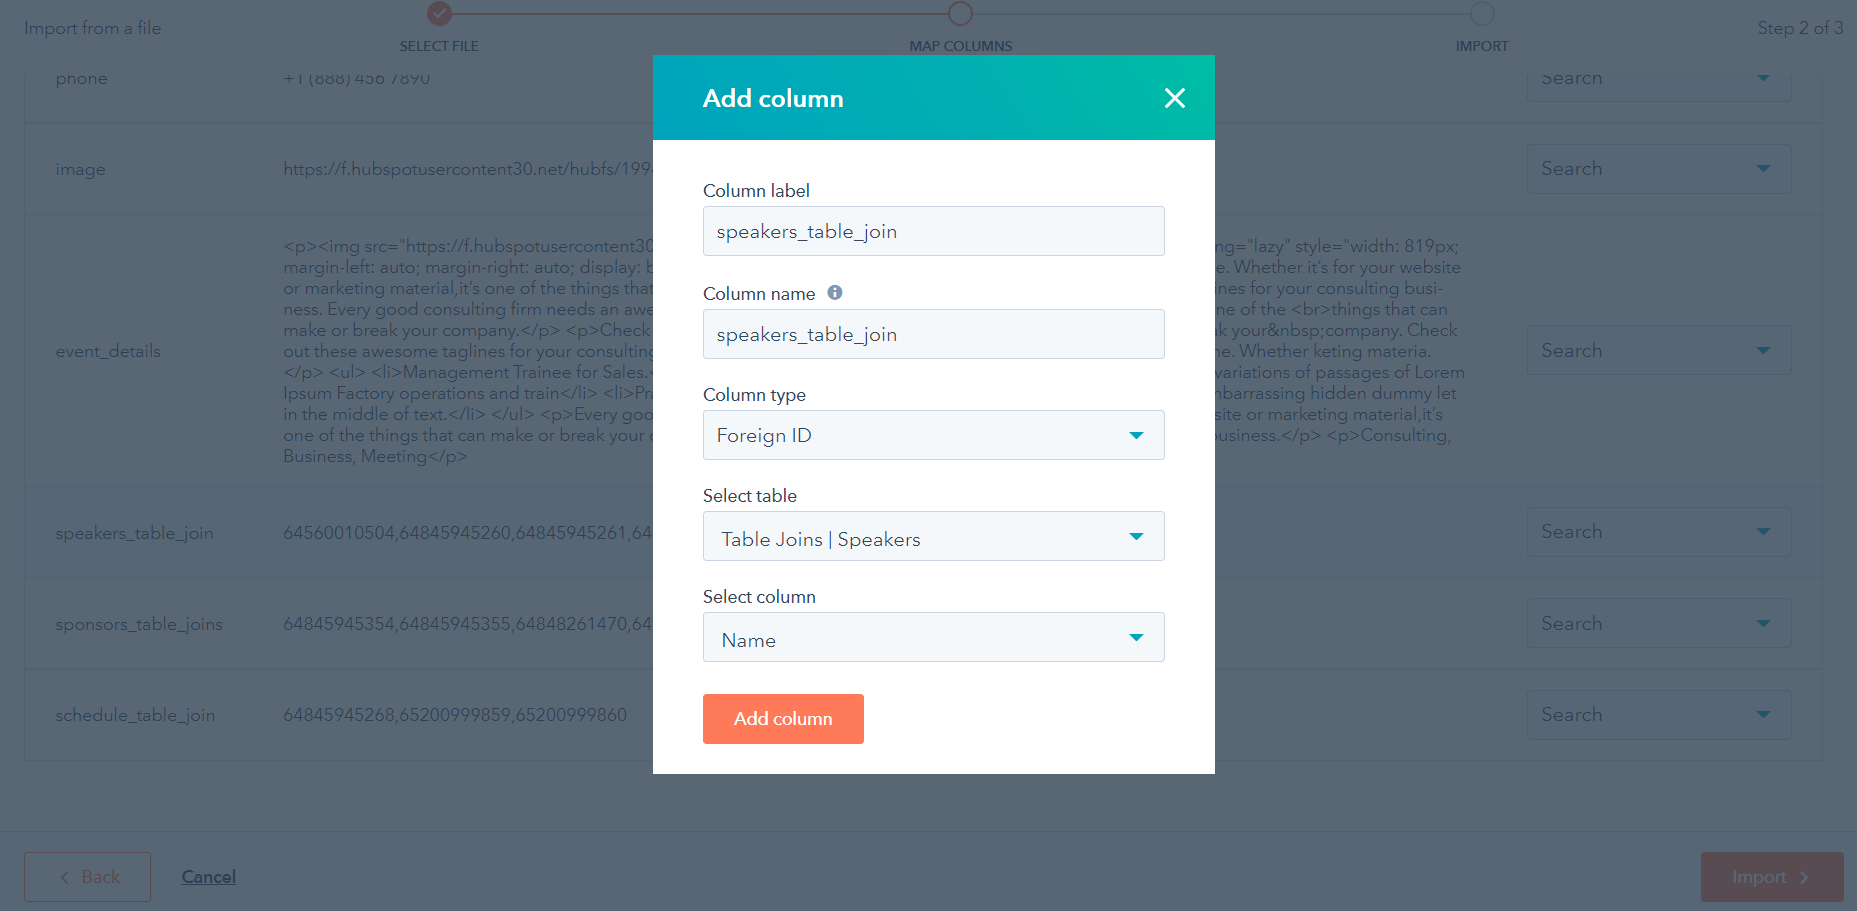
10) Now create the 'Event' table by following same process and import data after downloading the CSV file from https://oliev.radiantthemes.com/wp-content/uploads/2022/04/event-2022-04-28.csv link. While importing, for 'schedule_table_join', 'speakers_table_join' and 'sponsors_table_joins' fields of 'Event' table, choose all types as per below screenshot after changing details as per the table:-
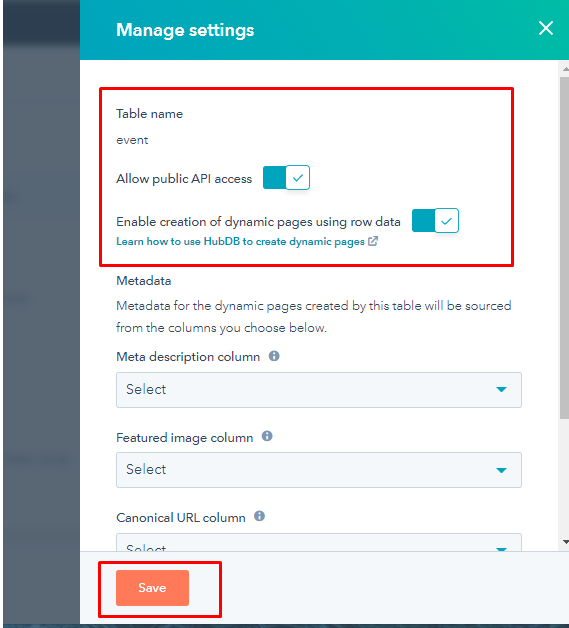
11) After creating the table, edit the table and click on 'Mange Settings' and and provide permission as per figure2.
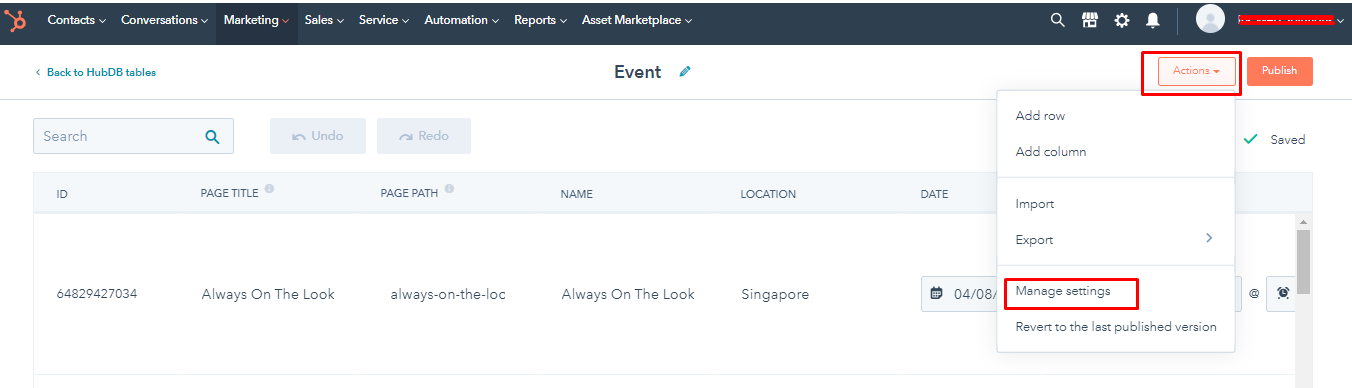
figure2
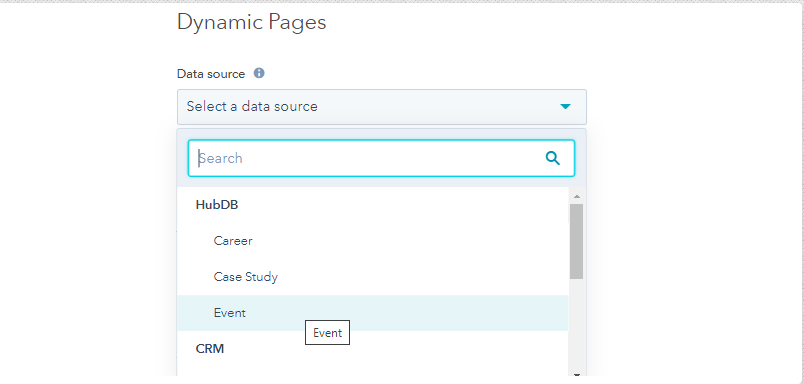
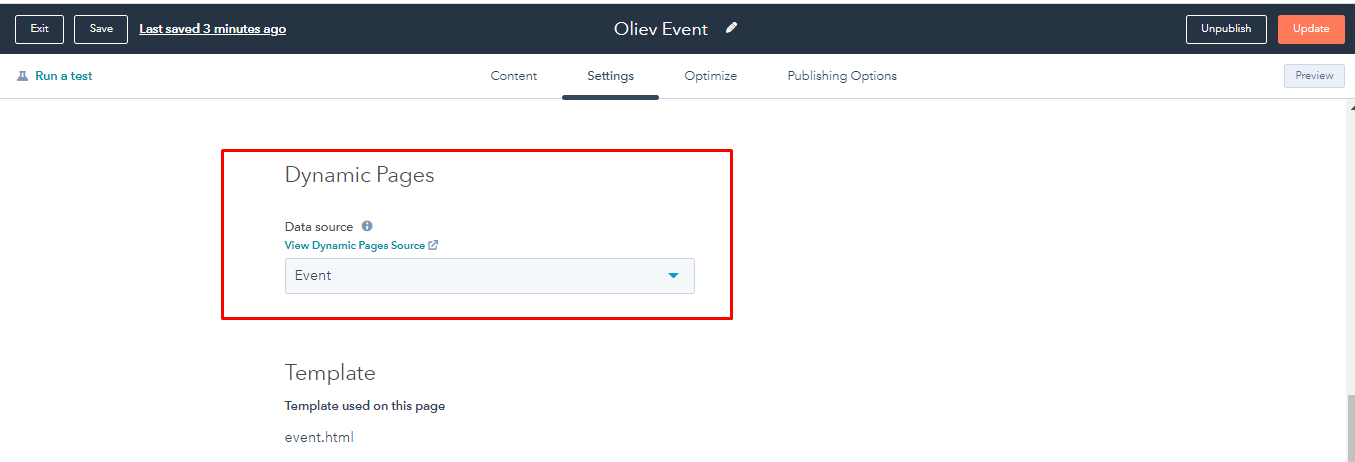
12) Now create the 'Event' page from 'Marketing > Website > Website Pages' by using events template and go to the settings of the page and select data source as 'Event' from HubDB.
Blog and Blog detail Pages
We've 3 types of Blog listing styles 2 types of Blog detail styles are available. You can choose any style among them from 'Theme Settings > Blog'.

You can change blog articles from 'Marketing > Website > Blog'.

You can change some texts which are not available in articles ( For example, By, Read More etc. ) from 'templates > blog-index.html' and 'templates > blog-posts.html' files. You can find those texts on those files and can change from there.
You can change blog header image by deleting the 'about-two-banner.jpg' image from images folder and upload your image with same name on images folder.

Setup contact forms
Please follow the below steps to setup contact forms:-
1) Create the form from 'Marketing > Lead Capture > Forms'.
After creating the form, you'll get a form id.
2) Now go the file where you want to add the form. For example, if you want to replace the form on contact page, then go to the 'templates > contact.html' file.
3) Go to the module section where the form is available. Now you need to change the form id on the highlighted part of below screenshot.
4) Also, it'll be better if you add form module like below (You can change 'extra_classes' as per your choice)
5) After adding the form code as per point 4, you need to select the form where you want to add the form (If you follow point 4, you don't need to select by editing page).
In case of popup form, you need to follow the same process as per above. Form code for popup form are available on 'template> partials > header.html' and 'template> partials > header2.html' (Since 2 headers are running on different pages).
Comments
0 comments
Please sign in to leave a comment.